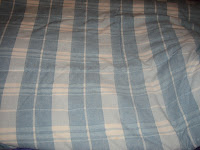
We have had this Duvet for several years and it is still in real good condition, it keeps me very warm when I am under it - the problem is, it's blue. We haven't had a blue bedroom in YEARS and with the changing of time it was time to change the Duvet. I didn't want to buy a new one because I'm Scottish and I do like to use what I have, so I decided to make a new cover for it instead.
I made this a few years ago so I don't have photos of the process but I'm sure you will be able to follow me as I describe the process?

I first acquired two king size flat sheets in different colors. You can often find just the flat sheets at discount stores, thrift stores, and yard sales for very little money. I knew I wanted solid colors but prints would work as well. For one side I purchased a cream colored sheet and for the other I purchased a white one. On the cream colored side I sewed a white rope border across the wide hem (the top of the sheet), on the white sheet, I sewed a cream rope border across the top. I had the rope trim in my stash of sewing odds and ends, so no cost there!
Placing right sides together, I then sewed the 2 sides and the bottom together (making a large pillow case). You can stop right there if you want but I added Velcro squares to the top so that once the blue duvet was inside I could close the top.
To put the king size duvet inside the king size cover, the easiest way I found was to use clothes pins to hold the duvet in place while you move the cover up. Start by placing one corner into the cover and pin it in place. Then do the same to the other corner. Then move across the bottom. Keep the pins there while you shake the cover up and into place. Using the Velcro, close the top. When it's in place. Remove the clothes pins.
Now I have a double sided duvet and it cost me very little money to make. When the snow is on the ground and the house is cold, I love pulling this up over me to keep me toasty warm.


Somewhere recently I saw a duvet cover that opened on one side, instead of at the bottom or top. That would make it somewhat easier to pull the comforter through it, but I'm not sure I'd like the look of having the closing on the side. Maybe that would work if it was on the wall-side of the bed? :) Good for you, being Scottish and frugal. I could use some of that Scottishness. Come to think of it, maybe I am somewhat Scottish. I have a hard time throwing things away that have lived beyond their usefulness.
ReplyDelete